The first question
Every dead graphics card that lands on the bench starts with the same question: does it draw anything? The motherboard answer is to plug it into a PC and find out, which is also how a shorted card takes a slot, a PSU rail, or itself a little further past saving.
The bench answer is a current-limited supply, a meter, and one switch. Power the card through a PCIe riser and its aux connectors, no motherboard anywhere, and read the current. Nothing, idle, or a short — you know which in about thirty seconds, and a short hits the supply’s current limit instead of anything you care about.
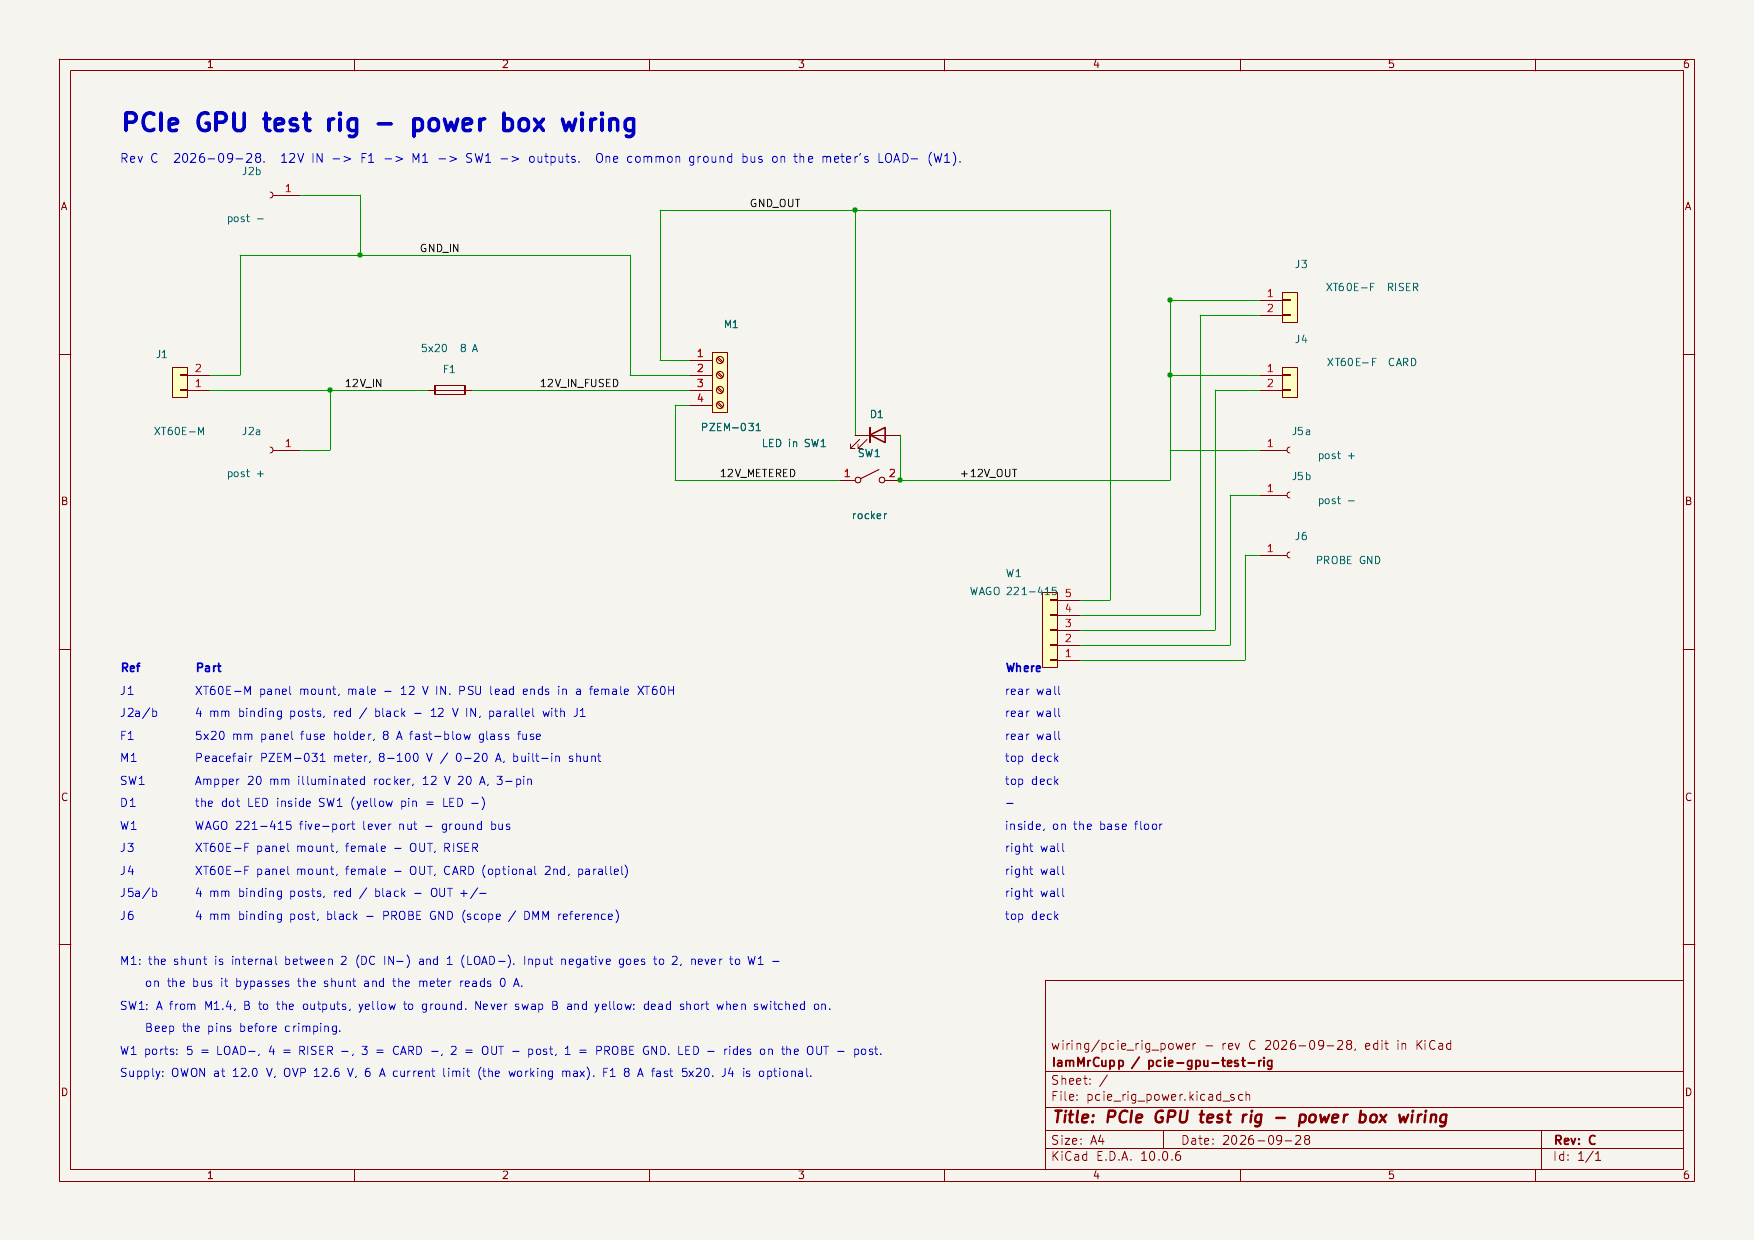
So I built a box for it. The schematic is public now: pcie-gpu-test-rig.
What’s in the box
12 V in → 8 A fuse → meter → rocker → outputs. That’s the whole signal path.
- Keyed XT60 outputs for the riser and the card, so a lead can’t go on backwards, with a banana pair beside them for probing or a supply with plain leads.
- A PZEM-031 volt/amp/watt meter ahead of the switch, so the box shows 12.0 V before the card is ever enabled.
- A probe-ground post on the deck, on the same bus the card returns through — the scope sees exactly what the card sees.
- Leads built from cut PCIe 6+2 cords with XT60s on the supply end, including a four-plug lead for the 8-pin → 12VHPWR adapter that newer cards need.
The protection is the bench supply, not the box. The OWON runs at 12.0 V, OVP 12.6 V, with a 6 A current limit. The fuse is a backstop. Everything else in the path is overrated on purpose — 20 A switch, 30 A connectors, 14 AWG wire. This is a diagnostic rig, not a load tester, and it should never be fed from an ATX or server supply that can happily dump tens of amps into a short.
What the meter tells you
| Reading | Usually means |
|---|---|
| About 0 A | Rails aren’t coming up — check the enable chain |
| Roughly 1–2.5 A | The card is idling |
| Supply drops into current limit | A short or a stuck phase — switch off and go find it with injection and the thermal camera |
The idle range is a starting point from other people’s builds, not a spec. Build your own table from cards you know are good.
Two traps, both silent
The kind of mistake that doesn’t blow up — it just lies to you.
- The meter’s shunt lives in the negative leg. Land the input negative on the ground bus instead of the meter’s own terminal and the current goes around the shunt. The meter reads 0.00 A forever, and a perfectly good card looks dead.
- The rocker has a load pin and an LED pin, and they look alike. Swap them and the first flick of the switch is a dead short across the meter. Beep the pins before you crimp anything.
Both are called out on the schematic sheet itself and in the wiring guide, which goes wire by wire with a continuity-and-polarity checklist before anything gets power.
The box it goes in
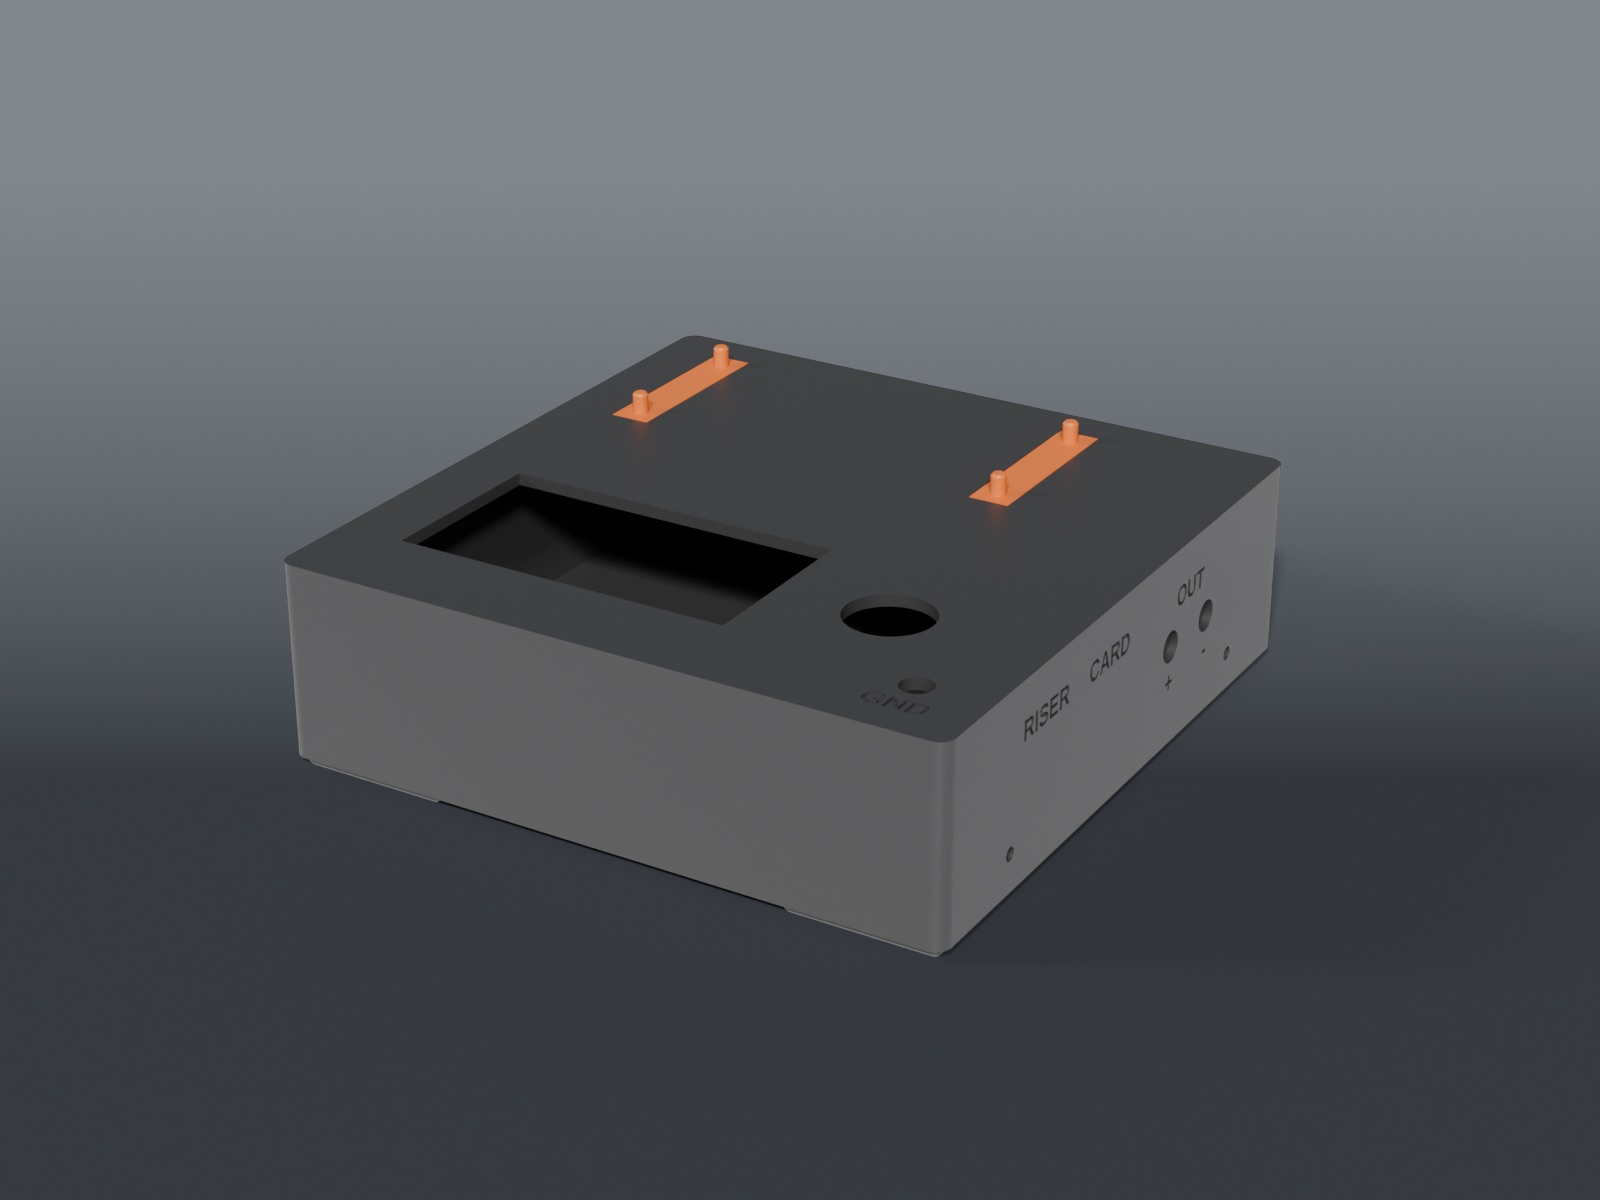
The enclosure is a 4×4 Clickfinity-footed print that latches into the bench grid like everything else. Meter, switch, and probe post on the deck, the riser docked on top, inputs and the fuse on the back so you can swap a fuse without opening it. Four side screws and the whole top lifts off with its wiring intact.
Every panel hole came off calipers on the real part, and none of them are trusted until a fit coupon says so — the XT60 cutouts don’t even exist in the model until the connectors are in hand and measured, because a plausible-looking number is exactly how two printed parts got scrapped in August. An assembly check that renders every part against every other part caught a lip hanging across an opening that the per-part checks were perfectly happy with.
The enclosure lives with the other models, in 3d-printer-models.
Honest limits
- This proves a card idles safely, and nothing more. A card that passes still needs a real system and a memory test before it goes back to anyone.
- PCIe reset floats on a bare riser. Most cards sequence their rails anyway; not every generation promises to. If a known-good card sits near 0 A, that’s the first place to look.
- The first sketch of this had separate 3.3 V and 1.8 V injection rails and a variable output built in. Rev C cut it down to the one path that has to work. The rest can come back in a later revision if the bench keeps asking for it.
Prior art
None of this is a new idea. northwestrepair’s Super Mega Tester Pro XL (2023) and GPU Solutions’ custom GPU testing power supply (2026) both build the same thing, and both were worth watching before I drew a line. This is my version, sized for my bench.
The schematic is KiCad 10, clean on every ERC severity and re-checked in CI on every push. MIT. Take it, and if you build one, the parts list is here. It’ll be on stream the first time a customer card goes on it.